Set up SSO with Okta
This guide describes a feature of the dbt Cloud Enterprise plan. If you’re interested in learning more about an Enterprise plan, contact us at sales@getdbt.com.
These SSO configuration documents apply to multi-tenant Enterprise deployments only.
Okta SSO
dbt Cloud Enterprise supports single-sign on via Okta (using SAML). Currently supported features include:
- IdP-initiated SSO
- SP-initiated SSO
- Just-in-time provisioning
This guide outlines the setup process for authenticating to dbt Cloud with Okta.
Configuration in Okta
Create a new application
Note: You'll need administrator access to your Okta organization to follow this guide.
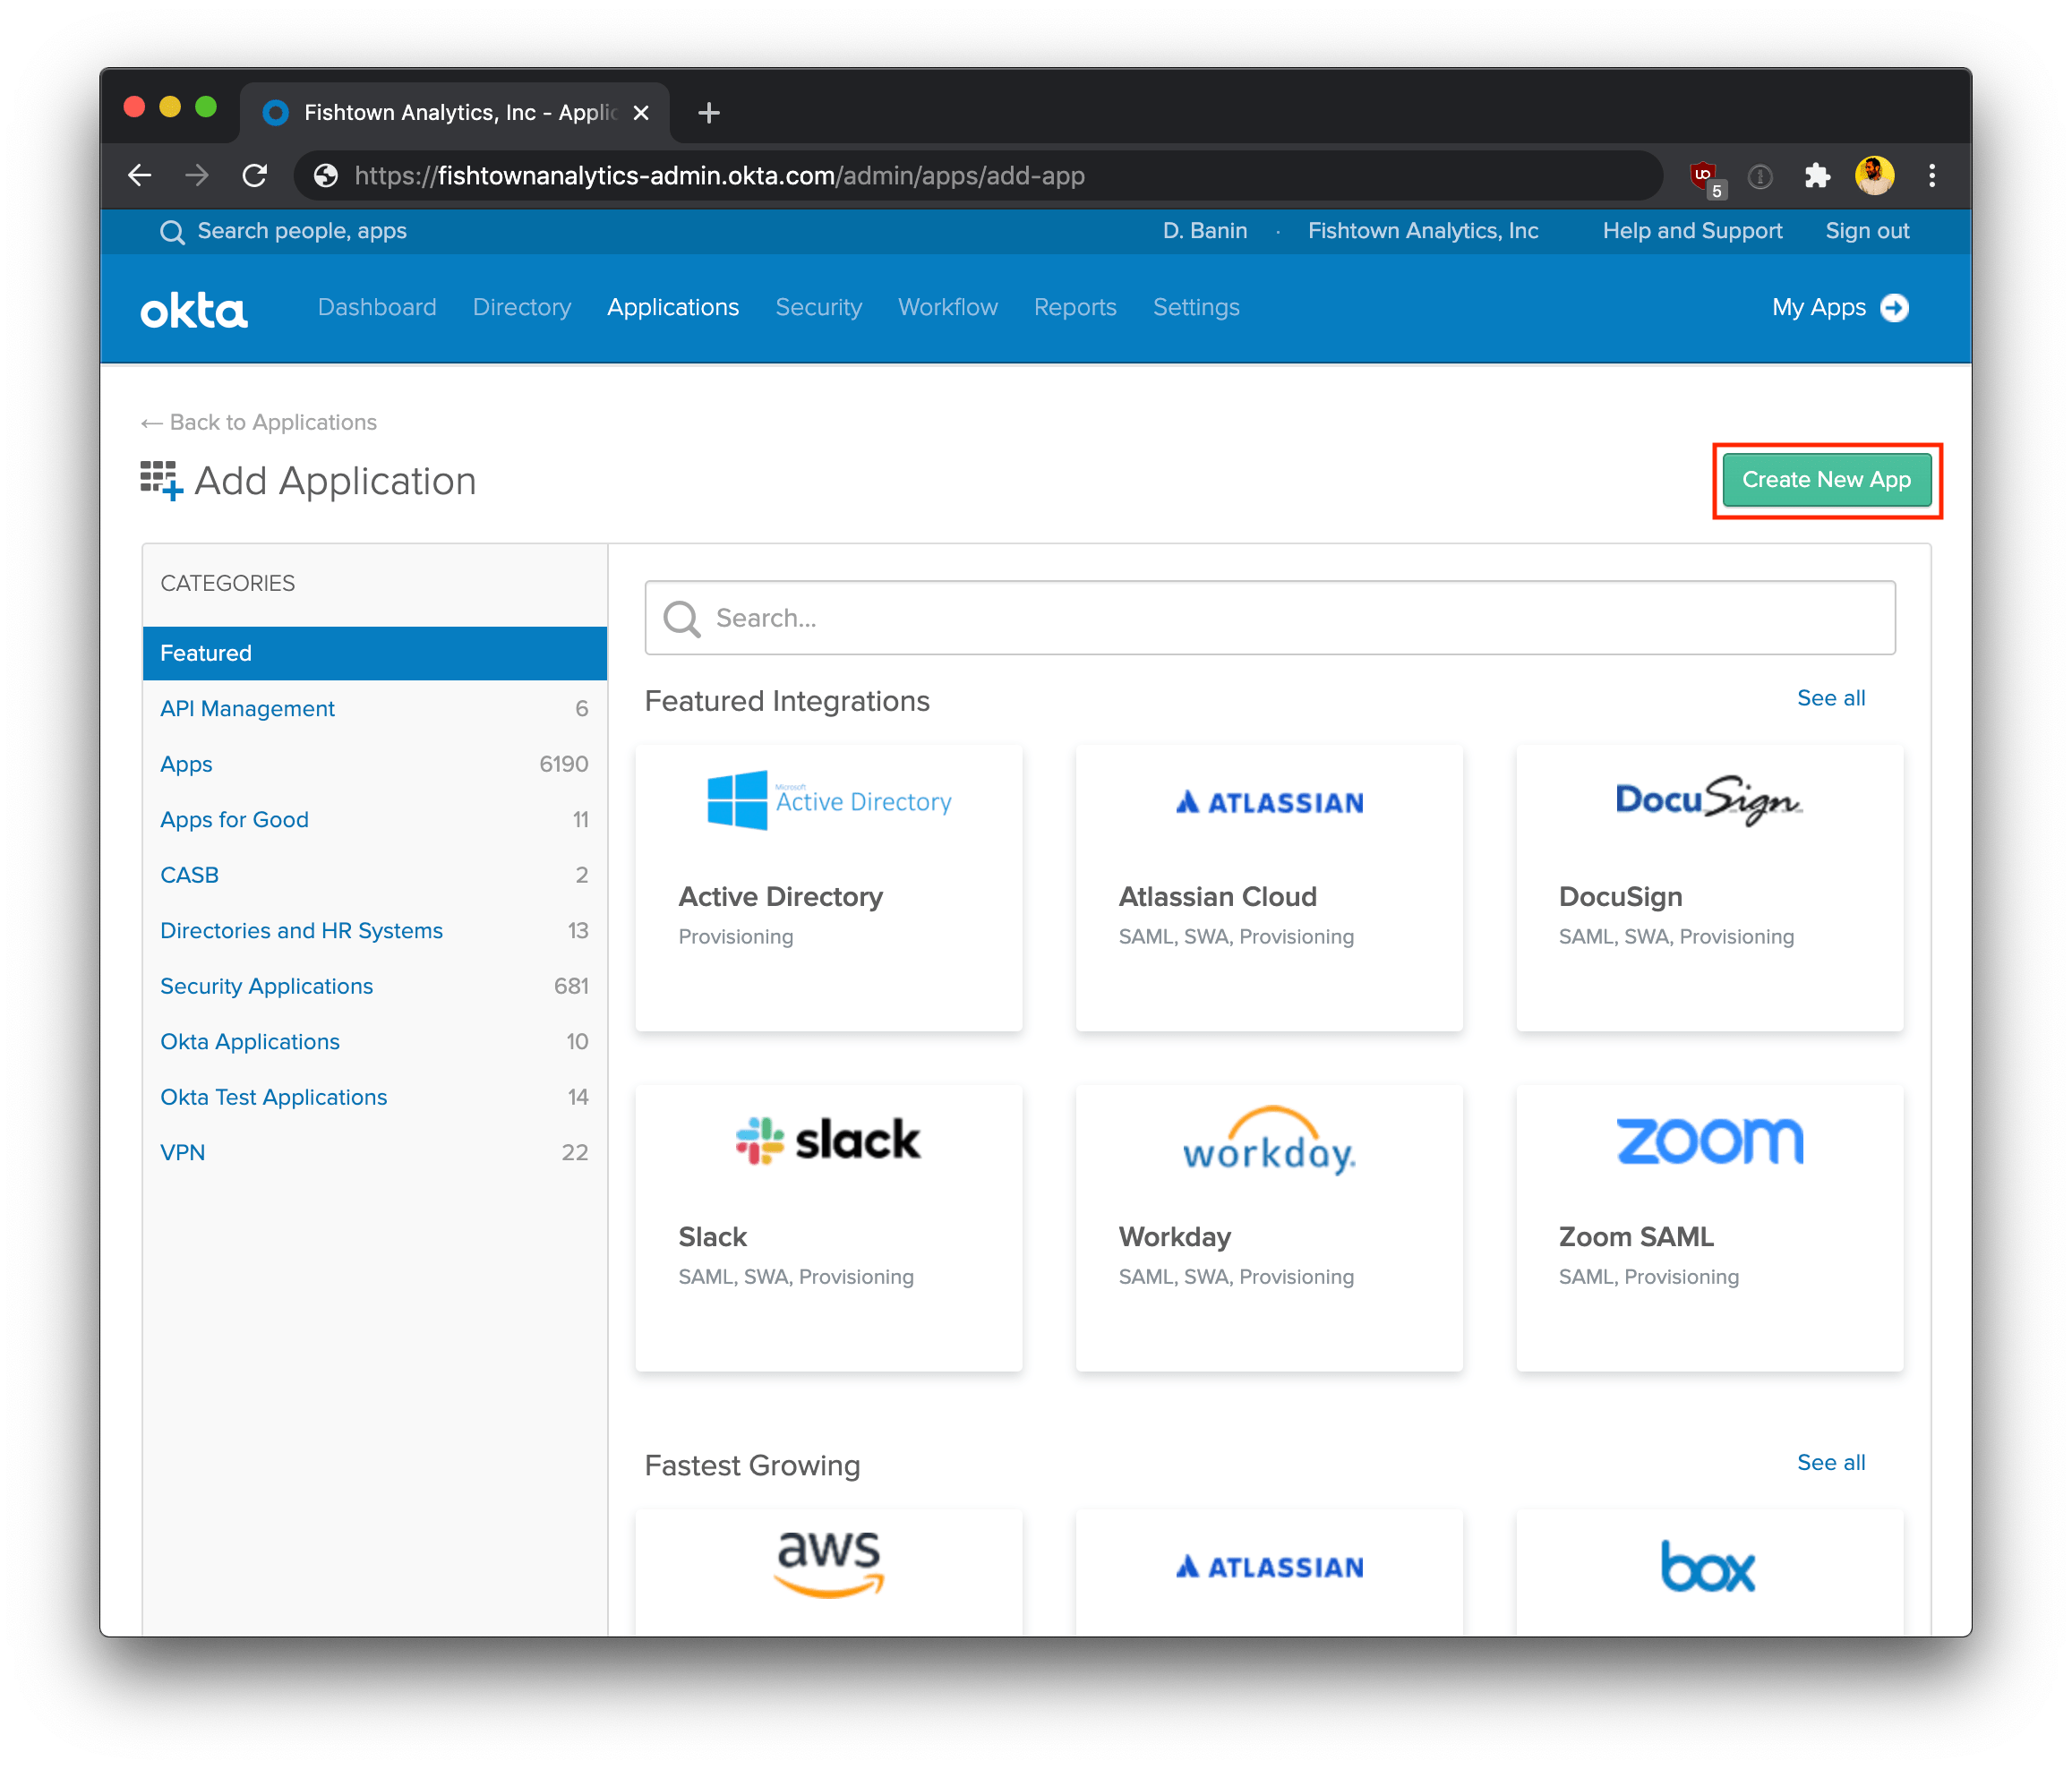
First, log into your Okta account. Using the Admin dashboard, create a new app.
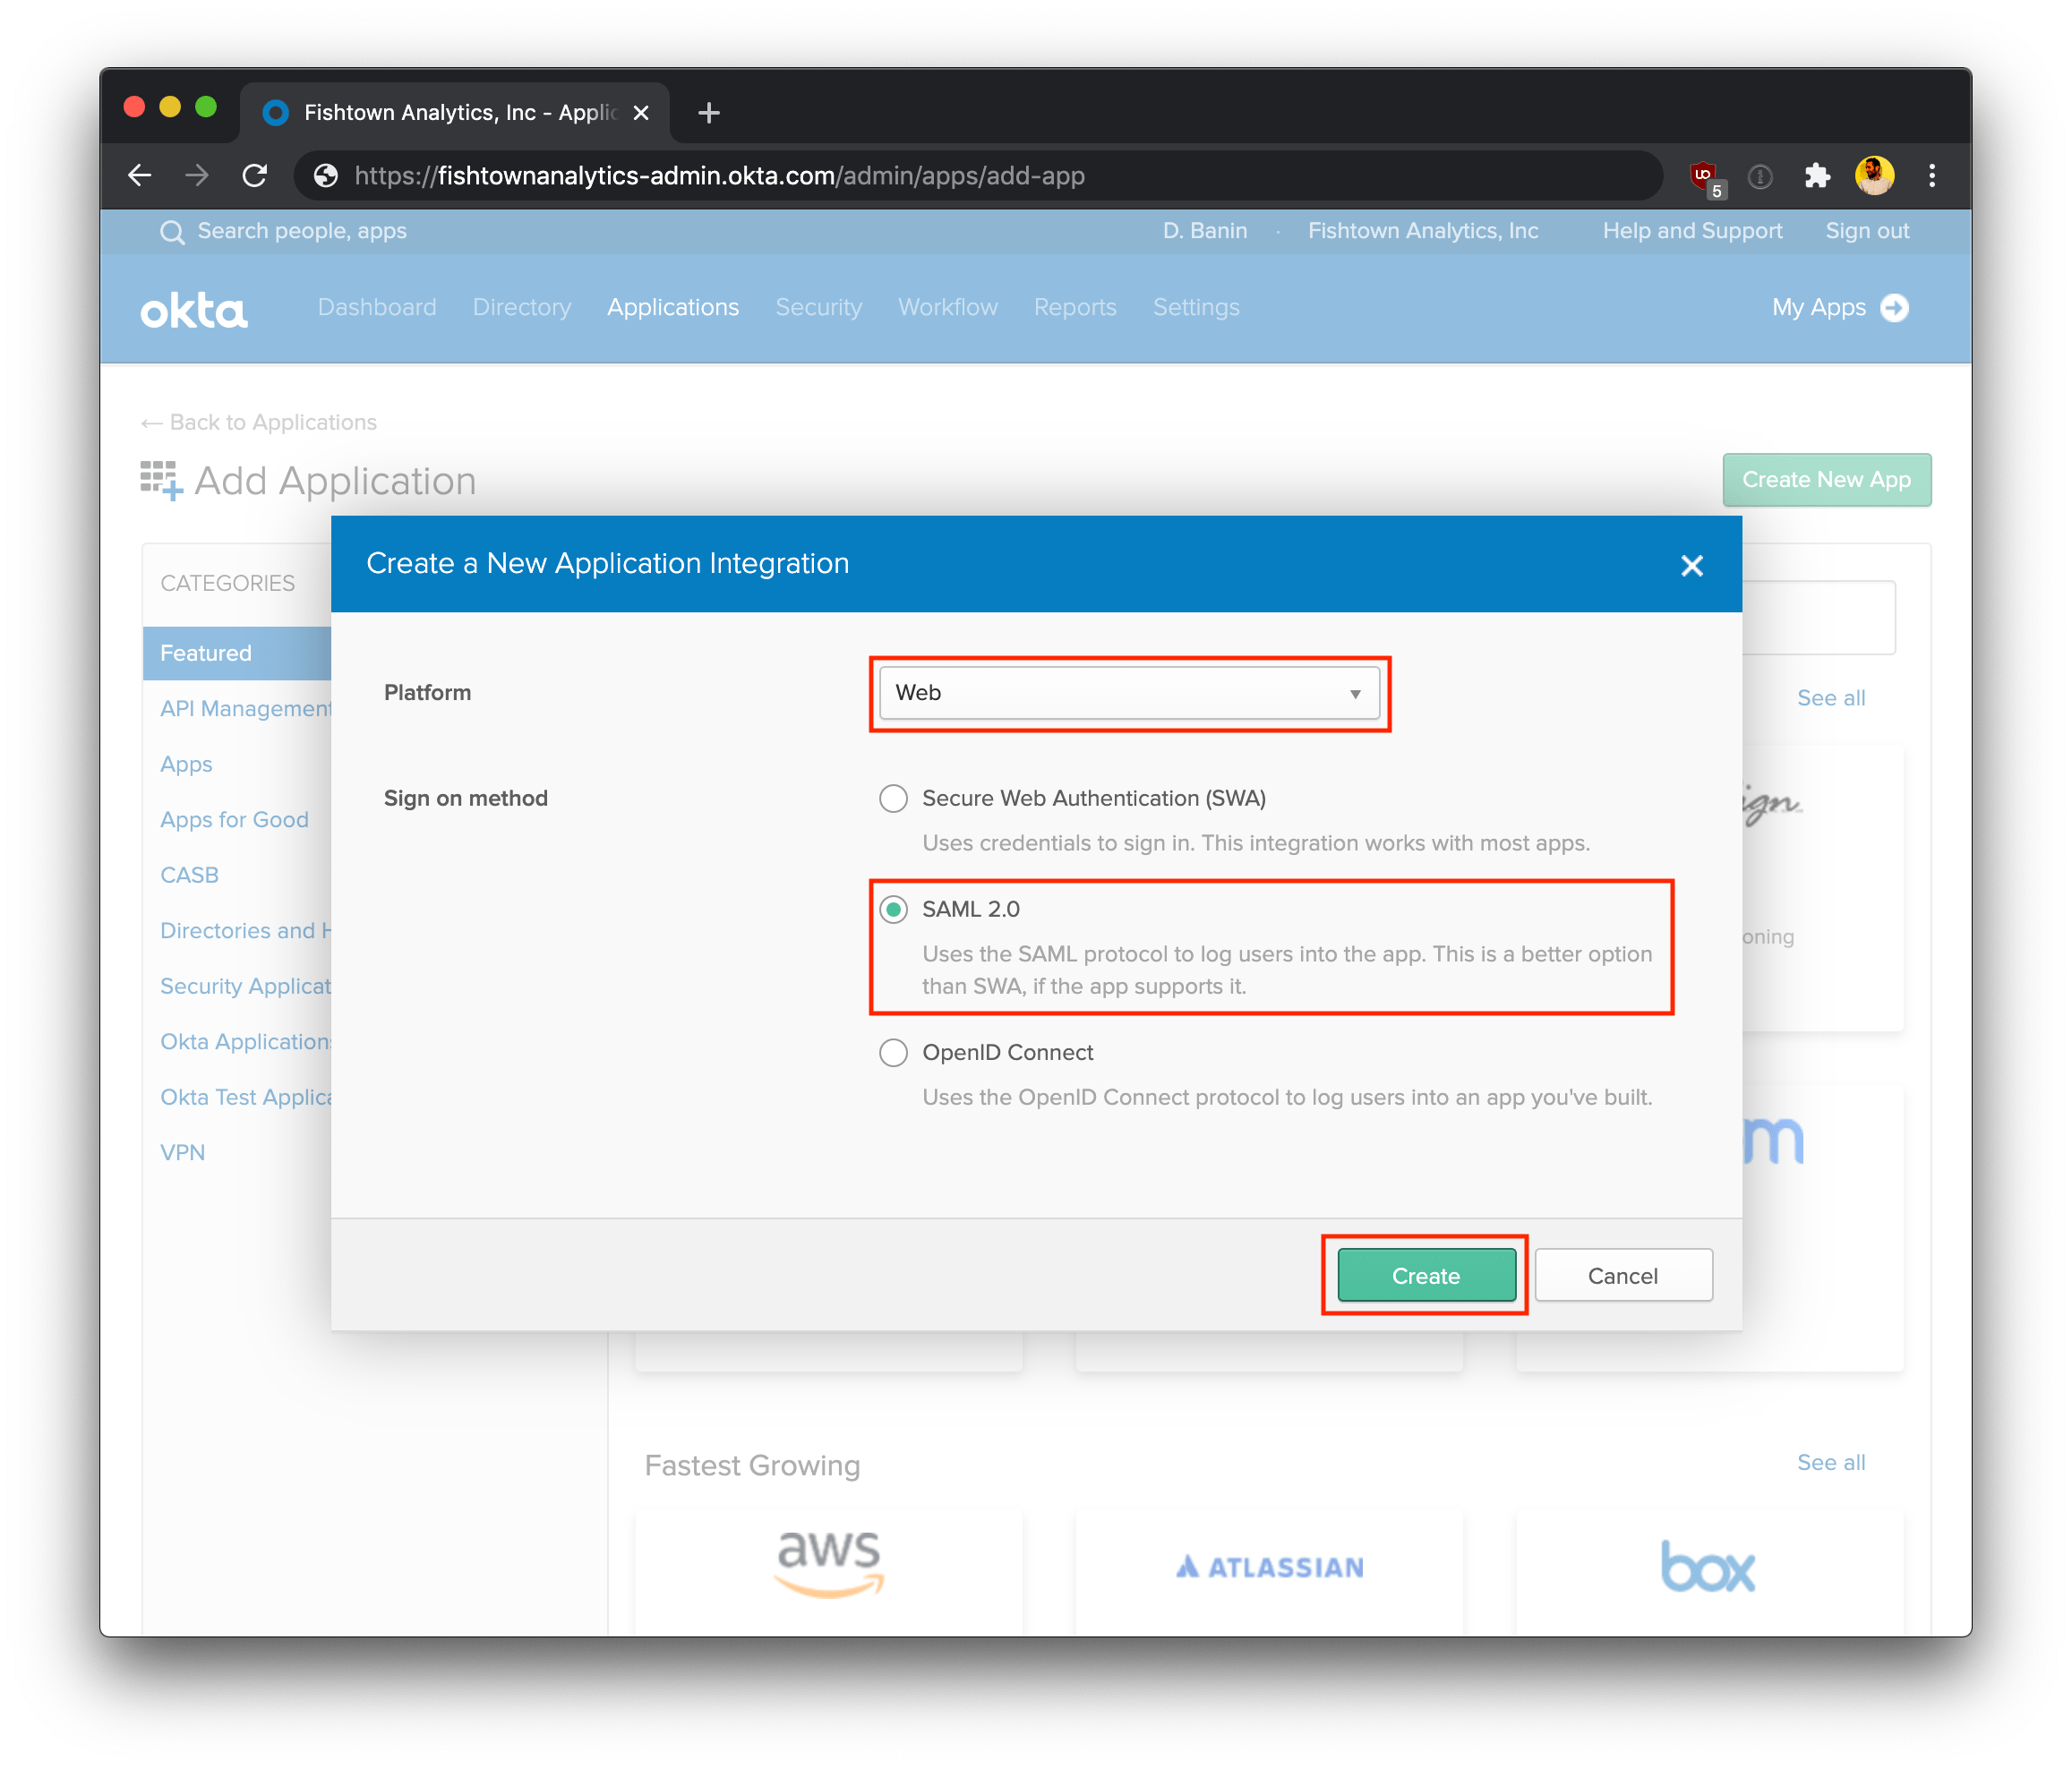
On the following screen, select the following configurations:
- Platform: Web
- Sign on method: SAML 2.0
Click Create to continue the setup process.
Configure the Okta application
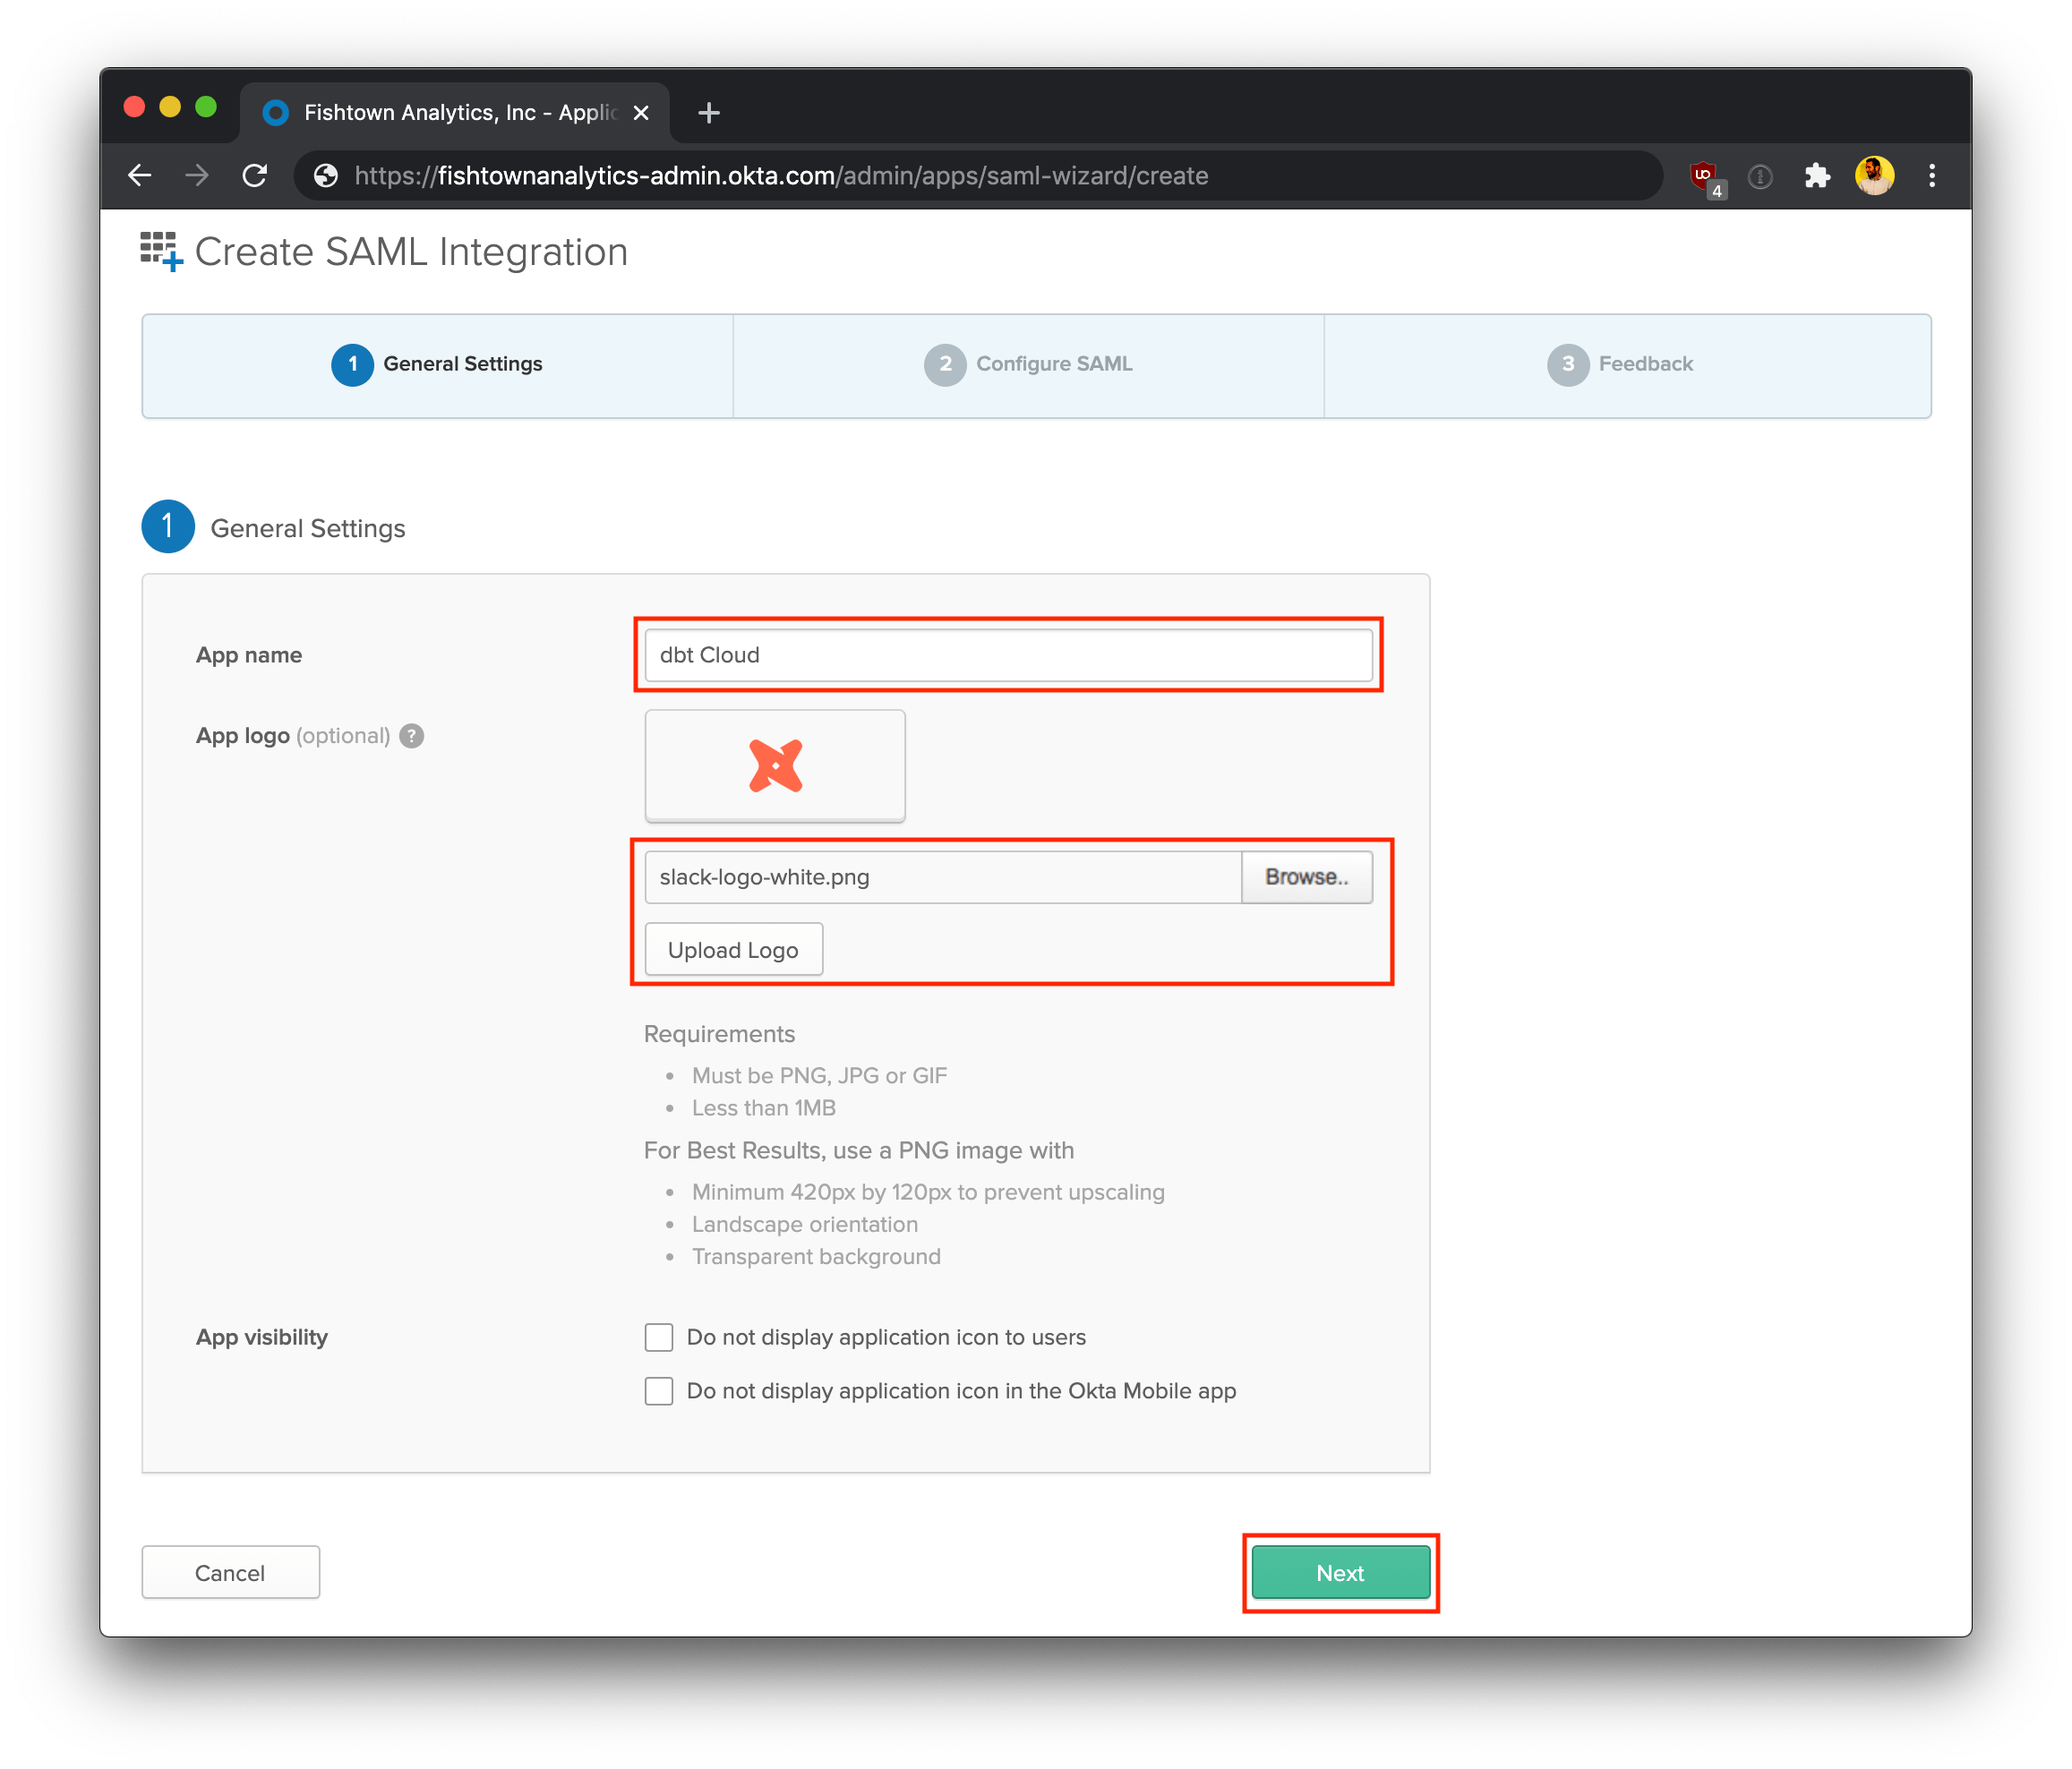
On the General Settings page, enter the following details::
- App name: dbt Cloud
- App logo (optional): You can optionally download the dbt logo, and upload it to Okta to use as the logo for this app.
Click Next to continue.
Configure SAML Settings
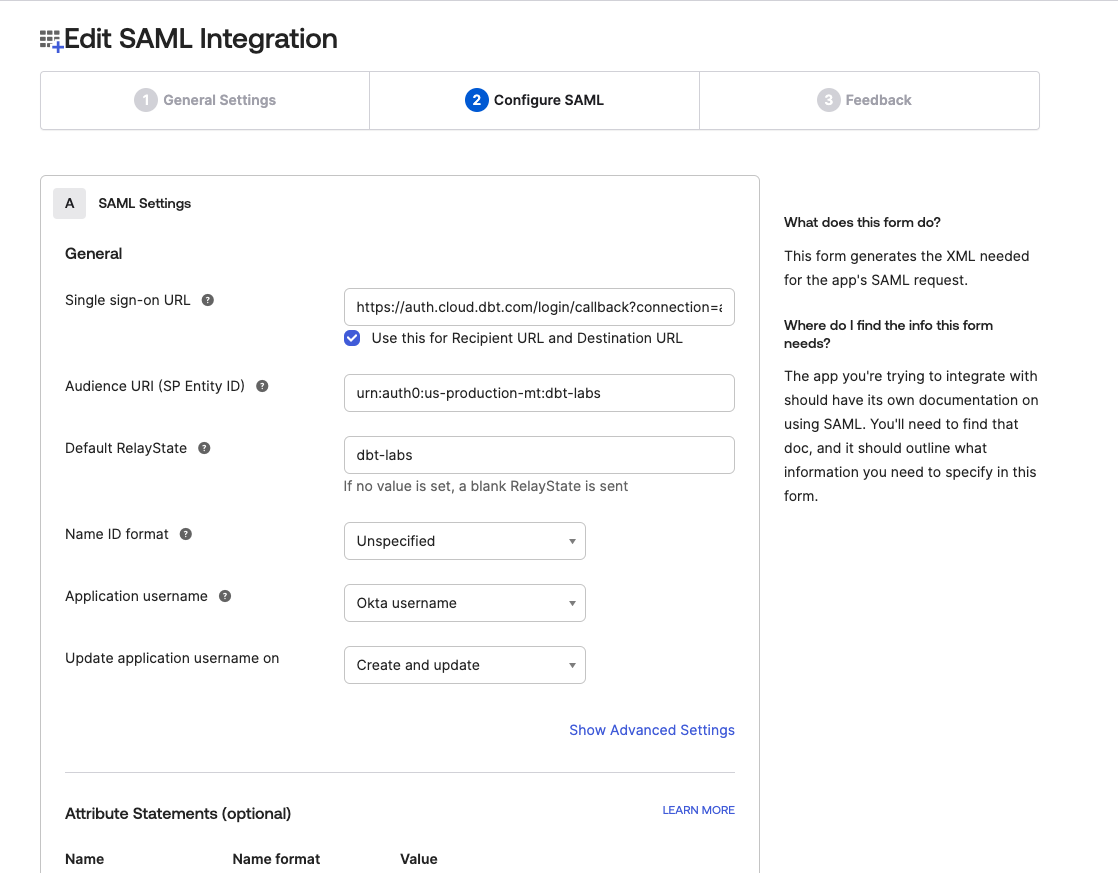
The SAML Settings page configures how Okta and dbt Cloud communicate. You will want to use an appropriate Access URL for your region and plan.
To complete this section, you will need a login slug. This slug controls the
URL where users on your account can log into your application via Okta. Login
slugs are typically the lowercased name of your organization separated with
dashes. It should contain only letters, numbers, and dashes. For example, the login slug for dbt Labs would be
dbt-labs. Login slugs must be unique across all dbt Cloud accounts,
so pick a slug that uniquely identifies your company.
The following steps use YOUR_AUTH0_URI and YOUR_AUTH0_ENTITYID, which need to be replaced with the appropriate Auth0 SSO URI and Auth0 Entity ID for your region.
- Single sign on URL:
https://YOUR_AUTH0_URI/login/callback?connection=<login slug> - Audience URI (SP Entity ID):
urn:auth0:<YOUR_AUTH0_ENTITYID>:{login slug} - Relay State:
<login slug>
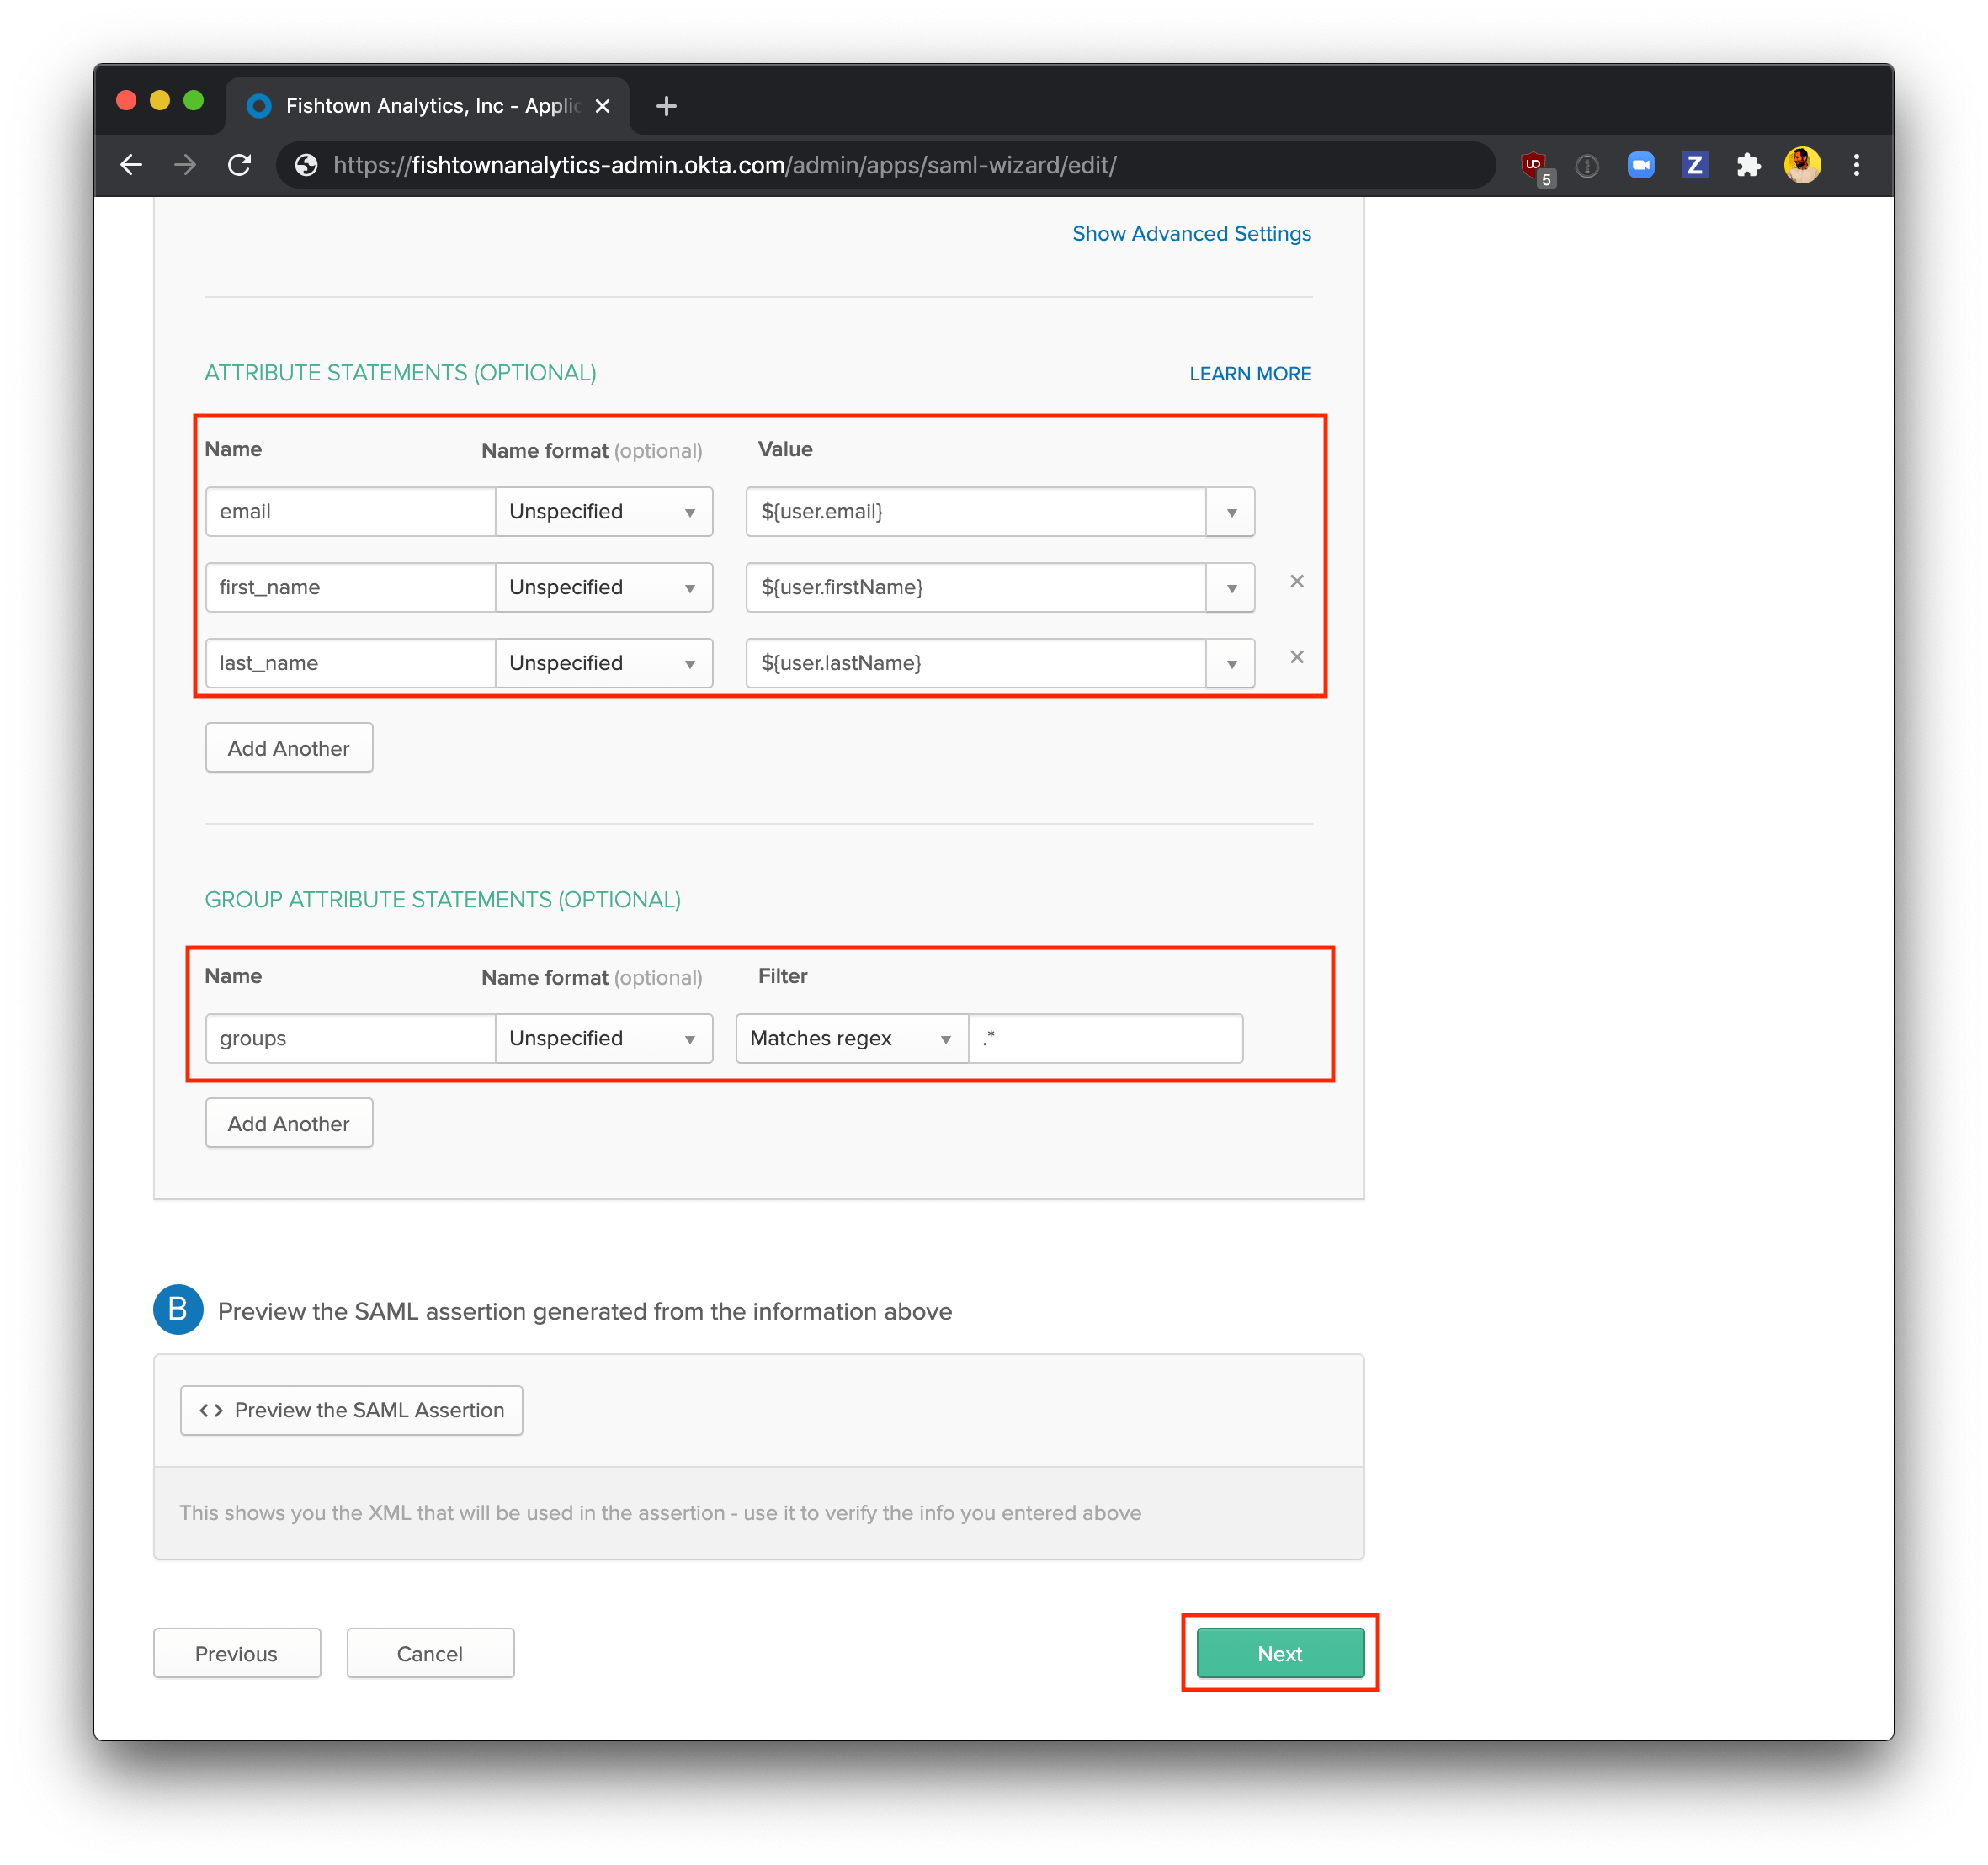
Use the Attribute Statements and Group Attribute Statements forms to map your organization's Okta User and Group Attributes to the format that dbt Cloud expects.
Expected User Attribute Statements:
| Name | Name format | Value | Description |
|---|---|---|---|
email | Unspecified | user.email | The user's email address |
first_name | Unspecified | user.firstName | The user's first name |
last_name | Unspecified | user.lastName | The user's last name |
Expected Group Attribute Statements:
| Name | Name format | Filter | Value | Description |
|---|---|---|---|---|
groups | Unspecified | Matches regex | .* | The groups that the user belongs to |
Note: You may use a more restrictive Group Attribute Statement than the
example shown above. For example, if all of your dbt Cloud groups start with
DBT_CLOUD_, you may use a filter like Starts With: DBT_CLOUD_. Okta
only returns 100 groups for each user, so if your users belong to more than 100
IdP groups, you will need to use a more restrictive filter. Please contact
support if you have any questions.
Click Next to continue.
Finish Okta setup
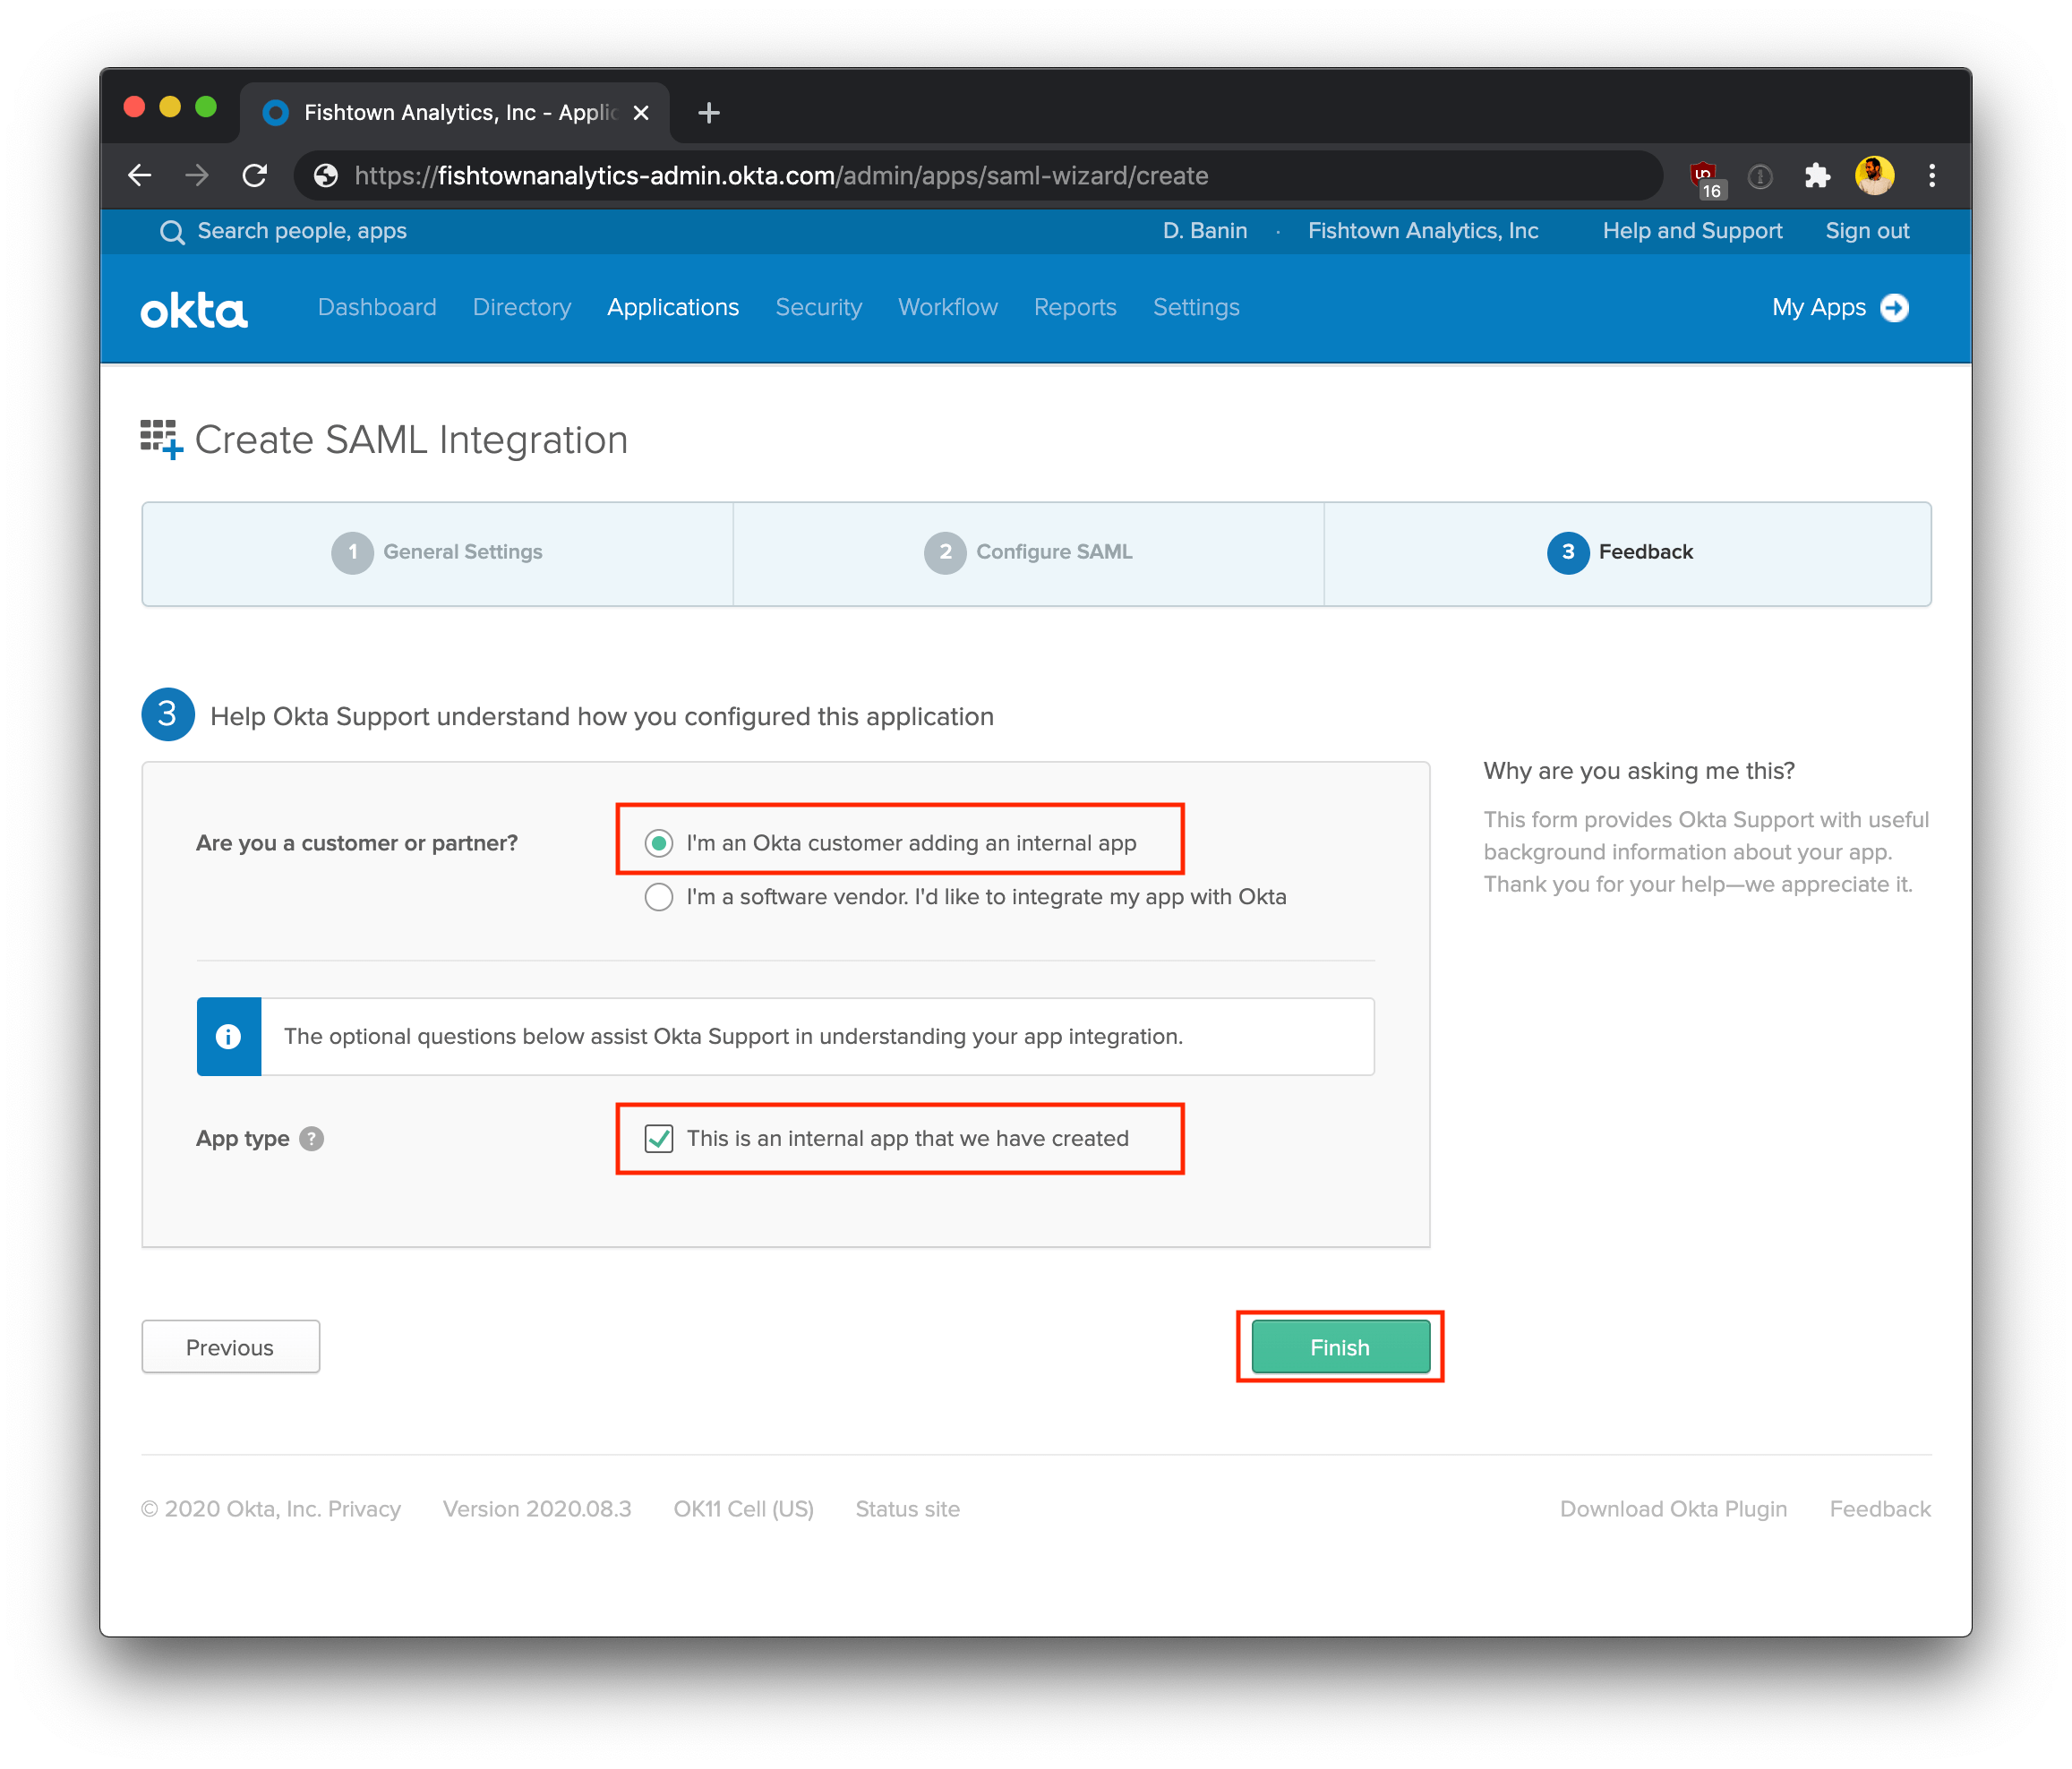
Select I'm an Okta customer adding an internal app, and select This is an internal app that we have created. Click Finish to finish setting up the app.
View setup instructions
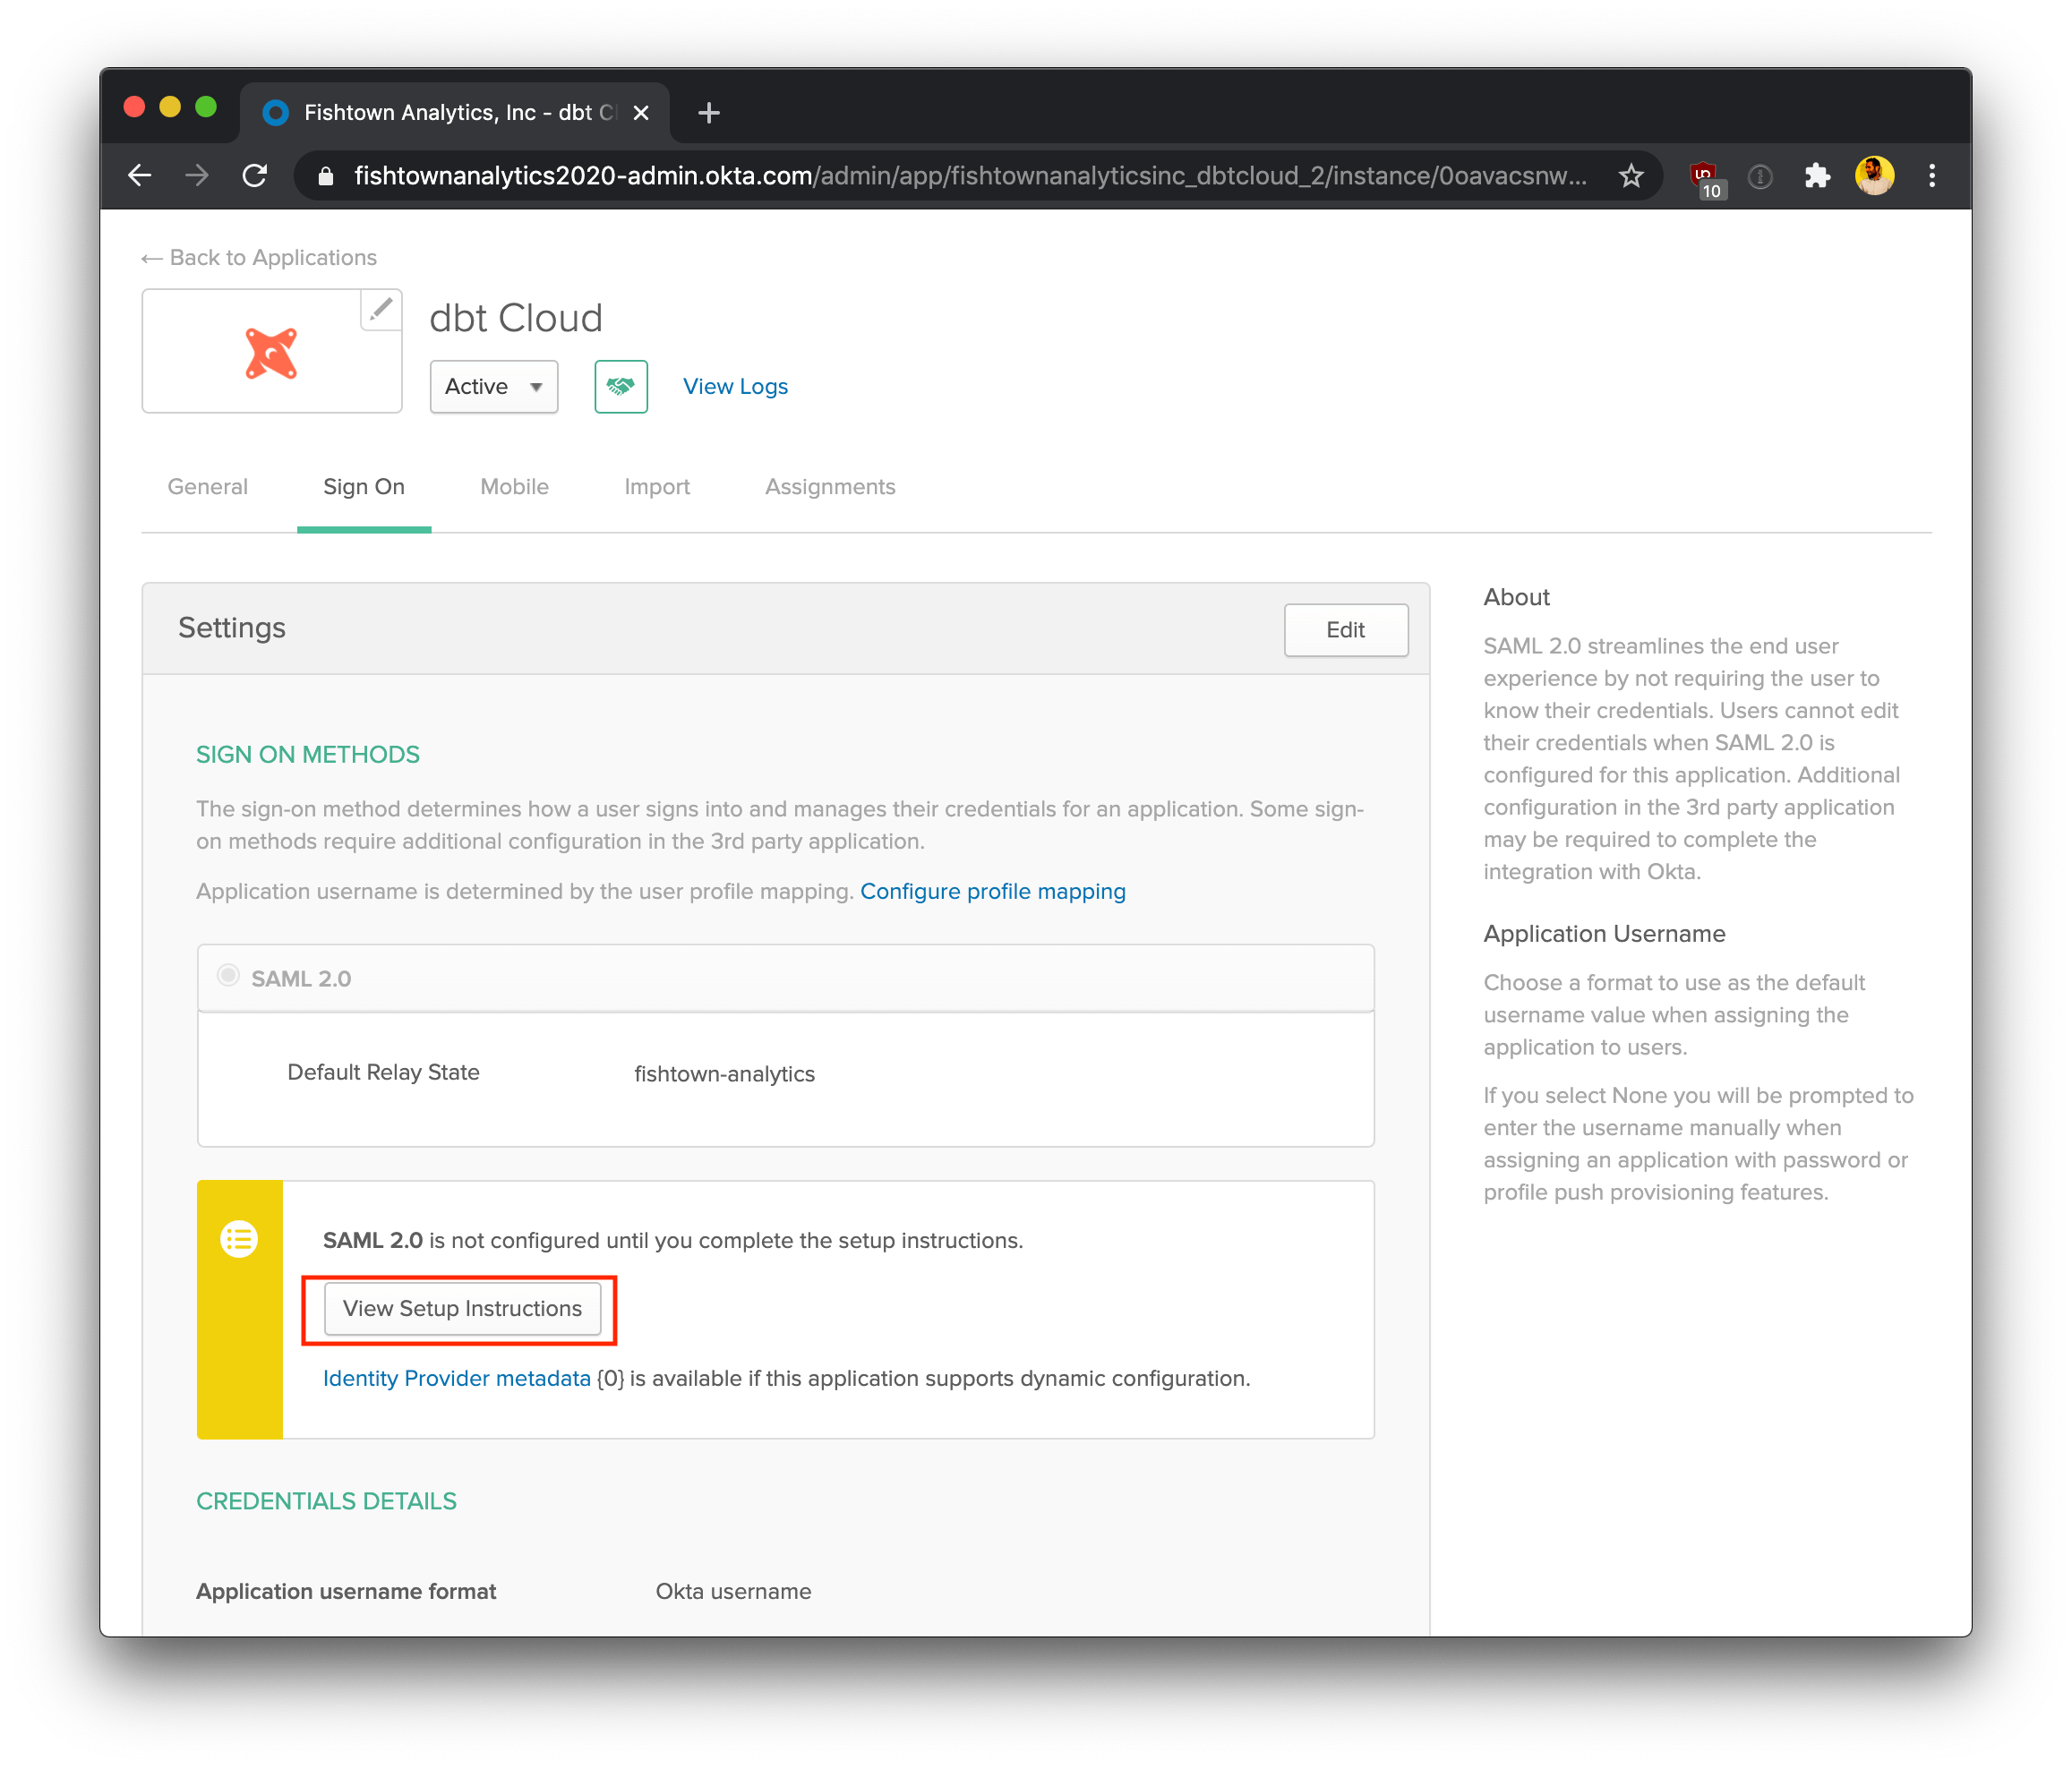
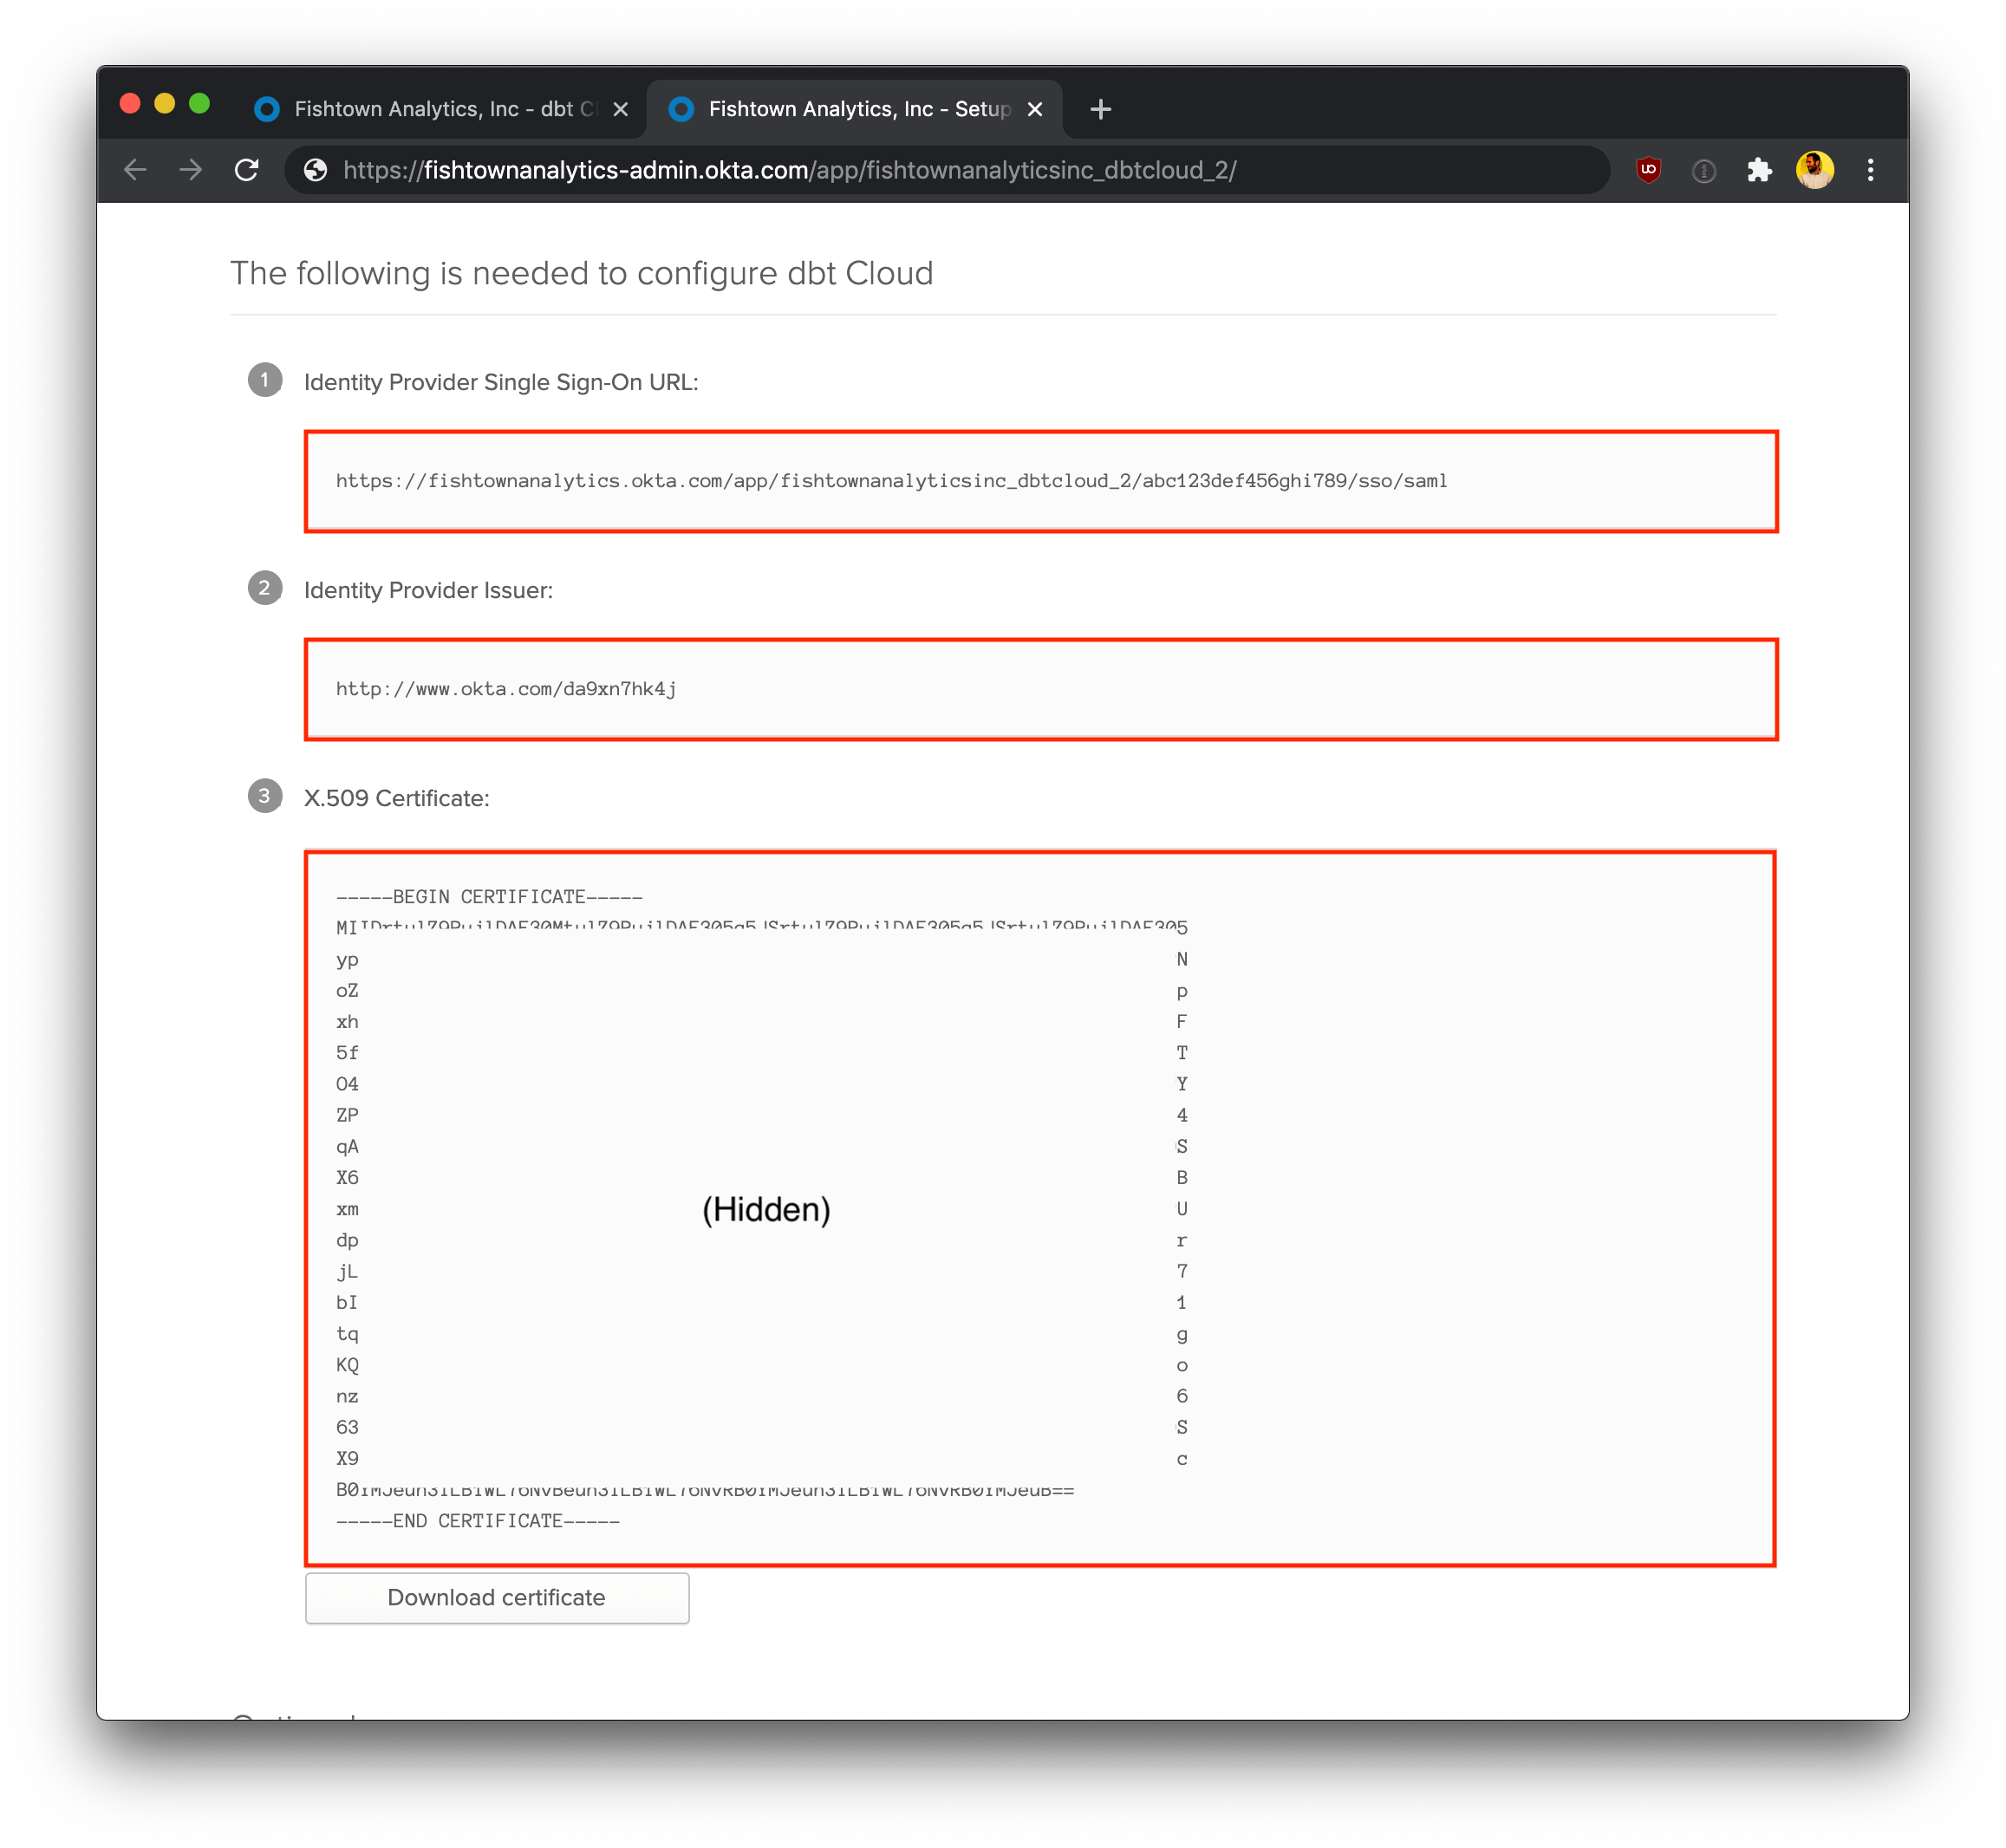
On the next page, click View Setup Instructions. In the steps below, you'll supply these values in your dbt Cloud Account Settings to complete the integration between Okta and dbt Cloud.
Configuration in dbt Cloud
To complete setup, follow the steps below in dbt Cloud.
Supplying credentials
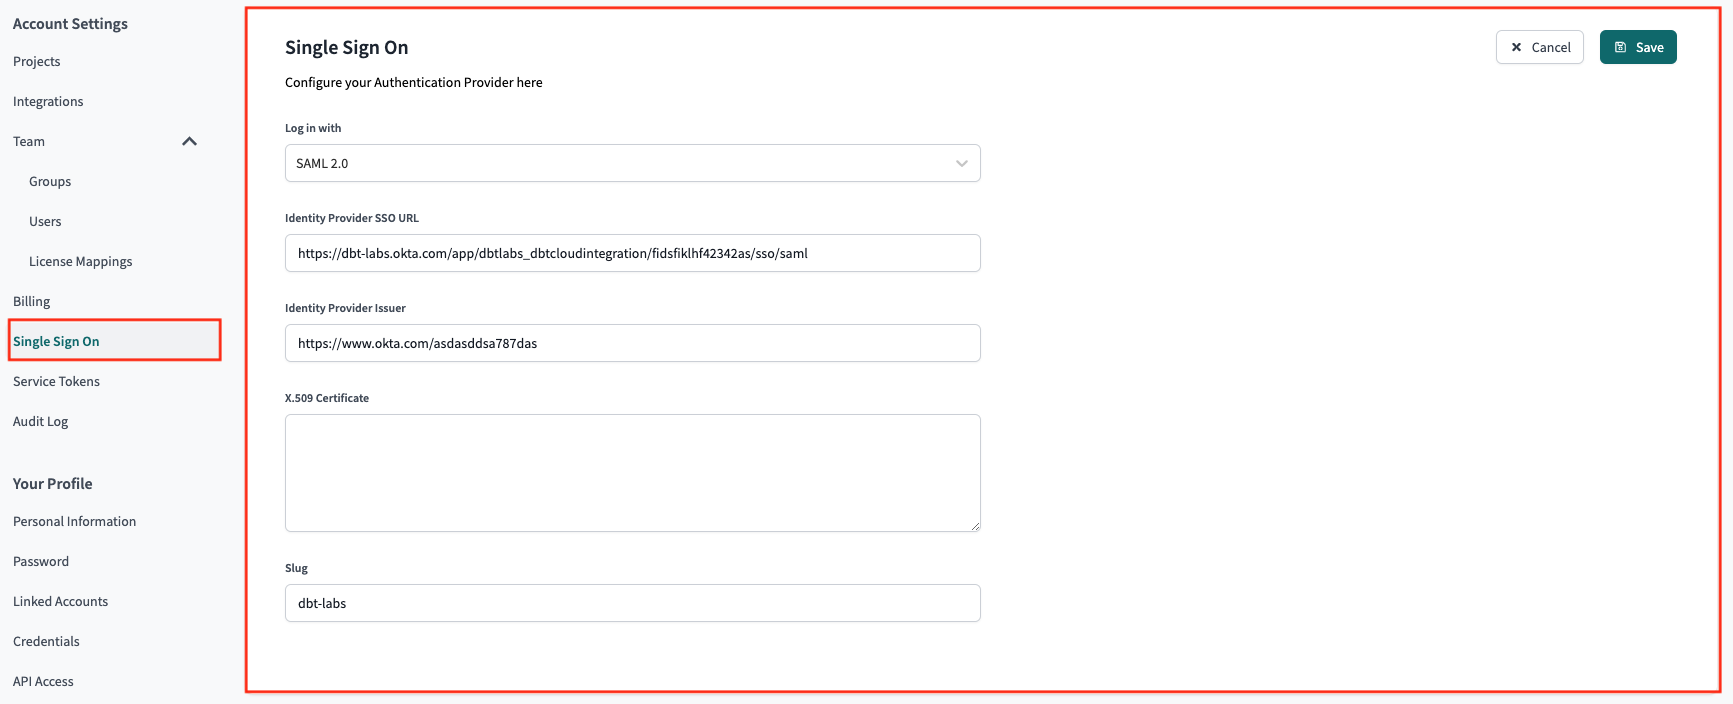
First, navigate to the Enterprise > Single Sign On page under Account Settings. Next, click the Edit button and supply the following SSO details:
The slug configured here should have the same value as the Okta RelayState configured in the steps above.
| Field | Value |
|---|---|
| Log in with | Okta |
| Identity Provider SSO Url | Paste the Identity Provider Single Sign-On URL shown in the Okta setup instructions |
| Identity Provider Issuer | Paste the Identity Provider Issuer shown in the Okta setup instructions |
| X.509 Certificate | Paste the X.509 Certificate shown in the Okta setup instructions; Note: When the certificate expires, an Okta admin will have to generate a new one to be pasted into dbt Cloud for uninterrupted application access. |
| Slug | Enter your desired login slug. Users will be able to log into dbt Cloud by navigating to https://YOUR_ACCESS_URL/enterprise-login/LOGIN-SLUG, replacing YOUR_ACCESS_URL with the appropriate Access URL for your region and plan. Login slugs must be unique across all dbt Cloud accounts, so pick a slug that uniquely identifies your company. |
- Click Save to complete setup for the Okta integration. From here, you can navigate to the URL generated for your account's slug to test logging in with Okta. Additionally, users added the the Okta app will be able to log in to dbt Cloud from Okta directly.
Users can now log into the dbt Cloud by navigating to the following URL, replacing LOGIN-SLUG with the value used in the previous steps and YOUR_ACCESS_URL with the appropriate Access URL for your region and plan:
https://YOUR_ACCESS_URL/enterprise-login/LOGIN-SLUG
Setting up RBAC
Now you have completed setting up SSO with Okta, the next steps will be to set up RBAC groups to complete your access control configuration.
